Meal Planning

April 2023

WIC Inspired Recipes – Stuffed Cabbage Rolls

2023-08-11T01:14:24+00:00April 7th, 2023|Categories: Meal Planning, Recipes, WIC Food, WIC Grocery Shopping|Tags: , , , , , , , , , , , |

STUFFED CABBAGE ROLLS

2 tbsp olive oil

1 cup onion, diced

2 tbsp garlic, minced

1 cup mushrooms, finely chopped

½ cup carrot, finely diced

1 green onion stalk, sliced

1 cup brown rice

1 head of cabbage

2 cups Tomato sauce

Seasonings: Salt, Pepper, Basil, Thyme, & Paprika

Preheat the oven to 350 degrees and prepare ingredients by chopping vegetables and cooking brown rice according to the package instructions.

Heat olive oil in a large skillet over medium heat and cook the onions until golden, about 10 min. Add garlic, mushrooms, carrot, green onion, and seasonings. Cook until the veggies are tender, about 8 – 10 minutes. Stir in the brown rice and 1/2 cup of tomato sauce, then remove from heat. Coat the bottom of a 9 x 13 baking dish with a thin layer of tomato sauce. 

Core a head of cabbage and bring to a boil in a large pot, until the cabbage leaves start to come apart. Fill each cabbage leaf with 2 – 4 tablespoons of the rice and vegetable mixture (depending on the size of the cabbage leaves), then roll the leaf up like a burrito, tucking in each end. Continue filling the leaves until there is no more mixture left, line the filled and rolled cabbage leaves in the baking tray.

 Cover with the remaining tomato sauce and cook for 45 minutes. Makes about 5 servings.

Make (and Eat) The Perfect Easter Eggs

2023-04-13T17:25:18+00:00April 4th, 2023|Categories: Kid Activities, Meal Planning, Recipes, Texas WIC, WIC Food, WIC Nutrition|Tags: , , , , , |

Making Easter Eggs is fun for kids and adults. Here are a few tips to make the perfect eggs and recipes to use when eating them.

Making the perfect Easter eggs involves a combination of boiling the eggs correctly, preparing a dye solution, and then decorating them creatively. Here’s a step-by-step guide to help you create beautiful and festive Easter eggs:

Boiling the eggs

  •         Place the eggs in a single layer in a large saucepan.
  •         Cover the eggs with cold water, about an inch above the eggs.
  •         Bring the water to a rolling boil over medium-high heat.
  •         Once boiling, remove the saucepan from heat and cover with a lid.
  •         Let the eggs sit for 10-12 minutes.
  •         Transfer the eggs to a bowl of ice water to cool them down and stop the cooking process. Leave them in the ice water for at least 5 minutes.

 Preparing the dye solution

  •       Choose your desired food coloring or natural dyes (such as beet juice, turmeric, or red cabbage).
  •       In a small bowl or cup, mix 1/2 cup of boiling water, 1 tablespoon of white vinegar, and 10-20 drops of food coloring (or the equivalent amount of natural dye).
  •       Stir the dye solution until the color is evenly mixed.

Dyeing the eggs

  •       Use a spoon or egg dipper to lower a cooled egg into the dye solution.
  •       Let the egg soak in the dye for 5-10 minutes, or until the desired color is achieved. The longer the egg is submerged, the deeper the color will be.
  •       Carefully remove the egg from the dye and place it on a drying rack or paper towel-lined plate to dry.

 Decorating the eggs

  •       You can use a variety of tools and materials to decorate your Easter eggs, such as markers, stickers, glitter, or paint.
  •       For a simple design, you can use a white crayon to draw patterns on the eggshell before dyeing, which will create a resist effect and leave the drawn areas white.
  •       You can also use rubber bands, tape, or stencils to create patterns and shapes on the eggs.
  •       If you want to add more colors, repeat the dyeing process with different colors and let each layer dry in between.

 Displaying your Easter eggs

  •         Once the eggs are completely dry, you can place them in a decorative basket, egg cups, or create an Easter egg tree by hanging them with colorful ribbons.

 Remember to be creative and have fun experimenting with different colors and designs. Happy Easter!

Once you have boiled Easter eggs, there are many delicious recipes you can make with them. Here are some ideas:

 DEVILED EGGS

6 boiled Easter eggs

1/4 cup mayonnaise

1 teaspoon mustard

Salt and pepper to taste

Paprika for garnish

Cut the eggs in half lengthwise, remove the yolks and place them in a bowl. Mash the yolks with a fork, then mix in the mayonnaise, mustard, salt, and pepper. Spoon or pipe the mixture back into the egg whites. Sprinkle with paprika and serve chilled.

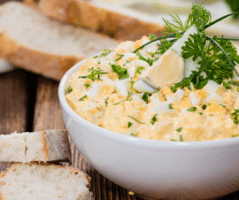
 EGG SALAD

6 boiled Easter eggs

1/4 cup mayonnaise

1 teaspoon mustard

1/4 cup chopped celery

2 tablespoons chopped red onion

Salt and pepper to taste

Chop the eggs and mix them with the mayonnaise, mustard, celery, and red onion. Season with salt and pepper. Serve on bread, toast, or with crackers.

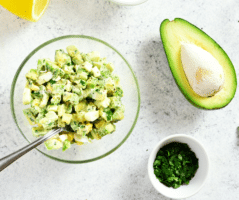
AVOCADO EGG SALAD

Avocado egg salad is a delicious and creamy twist on the classic egg salad. It’s a perfect option for a light and healthy lunch or snack. Here’s a simple recipe to make avocado egg salad:

6 boiled eggs, chopped

2 ripe avocados, diced

1/4 cup mayonnaise (optional)

1/4 cup chopped red onion

1/4 cup chopped celery

1 tablespoon chopped fresh cilantro or parsley

Juice of 1/2 lemon or lime

Salt and pepper, to taste

In a large mixing bowl, mash the diced avocados with a fork until they reach your desired consistency. You can leave it chunky or make it smoother, depending on your preference.

Add the mayonnaise (if using) to the mashed avocados and mix until well combined. The mayonnaise will add creaminess to the salad, but you can skip it for a healthier version or substitute it with Greek yogurt.

Gently fold in the chopped boiled eggs, red onion, celery, and cilantro or parsley. Make sure all the ingredients are well distributed throughout the mixture.

Squeeze the lemon or lime juice over the salad, and season with salt and pepper to taste. Mix well to ensure the flavors are evenly combined.

Cover the bowl with plastic wrap and refrigerate the avocado egg salad for at least 30 minutes to let the flavors meld together.

Serve the avocado egg salad on its own, with crackers, on toast, in a sandwich, or on a bed of lettuce. Enjoy this creamy and flavorful twist on a classic egg salad recipe!

Note: Avocado egg salad is best consumed the same day it is prepared, as the avocado may start to brown over time.

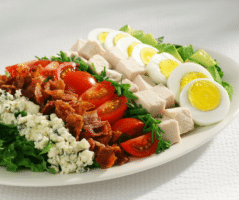
 COBB SALAD

4 cups chopped romaine lettuce

2 boiled Easter eggs, chopped

1 avocado, diced

1/2 cup cooked, crumbled bacon

1/2 cup diced cooked chicken or turkey

1/2 cup diced tomatoes

1/2 cup crumbled blue cheese

Your favorite dressing

Arrange the lettuce on a large plate or platter. Top with rows of chopped eggs, avocado, bacon, chicken, tomatoes, and blue cheese. Drizzle with your favorite dressing and serve.

 POTATO SALAD

4 cups cooked, cubed potatoes

4 boiled Easter eggs, chopped

1/2 cup mayonnaise

1/4 cup chopped pickles

1/4 cup chopped red onion

1/4 cup chopped celery

2 tablespoons chopped fresh parsley

Salt and pepper to taste

Combine the potatoes, eggs, mayonnaise, pickles, red onion, celery, and parsley in a large bowl. Season with salt and pepper. Mix well and refrigerate for at least 1 hour before serving.

 Enjoy these delicious recipes!


March 2023

Breakfast Using WIC Foods

2023-03-30T13:46:14+00:00March 28th, 2023|Categories: Meal Planning, Recipes, WIC Food, WIC Grocery Shopping, WIC Nutrition|Tags: , , , , , |

Try This Healthy Breakfast Twist On Classic Dessert Recipe

This easy recipe featuring WIC foods is so tasty, healthy, and filling that it’s great for anytime of the day – breakfast, snacks, or dessert.  If you feel like being creative, you can switch up your toppings by using different fruits, nuts, or different flavors of yogurt! Enjoy!

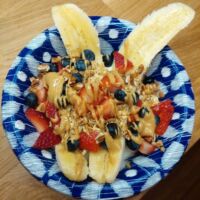
BREAKFAST BANANA SPLIT

½ cup Vanilla Yogurt

1 Banana – peeled & split in half

¼ cup Granola or Rolled Oats

¼ cup Mixed Berries – fresh or frozen

1 tbsp Peanut butter, heat up in microwave for 10 seconds at a time until melted

Optional – drizzle honey on top if you want it sweeter

Spread yogurt on a plate. Peel and split the banana and lay on top of yogurt. Top with granola, berries and peanut butter drizzle. Makes 1 serving.

BREAKFAST USING WIC FOODS

Looking for more recipes using WIC foods? Check these out: Smoothies, Egg Muffins, Blueberry Muffins

Get all your WIC foods in one easy stop at any Grocery Services North store. Find a store near you on our location page.

February 2023

WIC Inspired Recipes – Broccoli Tater Tots

2023-08-11T01:15:12+00:00February 20th, 2023|Categories: Meal Planning, Recipes, WIC Food, WIC Grocery Shopping, WIC Nutrition|Tags: , , , , , , , |

Broccoli Tater Tots

3 large russet potatoes

2 (12 – 14 ounce) bags frozen broccoli florets that have been thawed, or 8 cups steamed broccoli florets

2 cups shredded parmesan cheese (or mozzarella)

2 teaspoons salt, plus more for sprinkling on top

Olive oil

Place potatoes in a large pot and cover with cold water. Bring water to a boil and cook for 25 minutes, until fork tender but still have some give in the middle. Drain water and let potatoes cool until they are comfortable to handle. Once potatoes are warm enough to handle, remove the skins.

Preheat the oven to 375 degrees Fahrenheit. Grate potatoes on the large side of a grater and place into a large bowl.

Place the broccoli into a food processor and blend until it’s in very small pieces, 30 seconds – one minute. You may need to do it in two batches. Place broccoli onto paper towels and squeeze all excess water out.

Add the broccoli to the grated potatoes along with the salt and mix everything together well.

Line a large cookie sheet with parchment paper. Use your hands to form small cylinders with the mixture. Use about 1 tablespoon per tater tot. Place the cookie sheet in the freezer for about 10 minutes to allow them to firm up.

Brush the top of each tater tot with a small amount of olive oil and sprinkle each one with salt. Bake tater tots until browned crispy, about 30 minutes, flipping halfway though.

This recipe works great in an air fryer too!

Enjoy!

A-B-Cs For First-Time Moms

2023-02-17T13:42:49+00:00February 17th, 2023|Categories: Child Health, Meal Planning, Mom Health, Pregnancy, Texas WIC, Uncategorized, WIC Food, WIC Nutrition|Tags: , , , |

Being a parent for the first time is both an incredibly exciting and nerve-wracking experience. New moms want to do everything they can to make sure your little bundle of joy stays healthy, happy, and safe. Here are a few A-B-Cs for first-time moms. Read on to learn just a few ABCs necessary for anyone getting ready to be a mommy for the first time!

Acknowledge that you’re scared, but be excited at the same time!

It’s normal to be nervous. Give yourself credit for taking this big step into motherhood. Plus, it never hurts to seek out expert advice from professionals like those at Texas WIC who specialize in infant nutrition and growth monitoring – they’ll help make sure you’re well informed while navigating through these exciting times!

Believe in yourself – you can do this!  Sometimes every new mom just has to know she can do it.  When in doubt, reach out to your doctor or Texas WIC for help. Texas WIC is a great resource for moms. It is a nutrition education program that assists moms until their child turns 5 years old.  If you would like to see if you qualify for Texas WIC, you can apply at TexasWIC.org/apply.

Connect with other moms, either virtually or in person. Every mom needs a support system. This is one great way to get a little extra helpful advice. Social media is also a great place to connect with other moms. Plus, you might make a few new friends at Texas WIC. 

FEW MORE ‘C’s FOR FIRST-TIME MOMS

  • Create a routine and stick to it as much as possible. Looking for more information about creating routines, check out these tips for newborn babies.
  • Cherish every moment – even the tough ones!

EASY WIC GROCERY SHOPPING

To make being a mom even easier, visit a Grocery Services North store for easy WIC grocery shopping. You can get all your WIC foods in one easy stop. Find a store near you here.


Baby Teething Cookies

2023-06-27T18:57:28+00:00February 13th, 2023|Categories: Baby Food, Child Health, Meal Planning, Recipes, WIC Food, WIC Nutrition|Tags: , , , |

Your Little One Will Love These Valentine Biscuits All Year Long

If your baby is learning to eat table food, these are the perfect Valentine’s Day treat. 

These teething biscuits are made with WIC-approved baby cereal and baby food. Use any baby food flavor your little one likes. Experts recommend that you have tried each of these food items separately before combining them, in the event there is a food allergy. So try a baby food flavor and baby cereal your little one likes. 

The texture, flavor and even fun shapes are sure to be a hit. The consistency is a little chewy, perfect for a baby to learn how to use their mouth to chew. As always, make sure you watch your baby eat while they test out these lovable cookie treats. These are also perfect for mom because they are super simple to make.

BABY TEETHING BISCUITS 

1 jar of baby food, any flavor

¾ cups of flour for cookies

½ cup of flour for dusting

3 tablespoons of water

Sprinkle of ground cinnamon

1 cup of baby cereal (we used oatmeal)

Mix all ingredients together in a bowl. Mix wet and dry ingredients until fully incorporated. You may need to add a bit more water to make sure all the dry ingredients are moist. Form a ball. Prepare the surface and rolling pin by dusting with flour. Roll out your dough like you would cookies. Cut using cookie cutters or just use a knife to make bars. Place on a cookie sheet and bake for 10 minutes at 425 degrees. Let them cool entirely before you give them to your little one. Make sure they are cool to the touch. Store in an air-tight container in the refrigerator until ready to use.

GROCERY SERVICES NORTH

Get all your WIC foods, including your baby food and cereal, at any Grocery Services North store. You can get all your WIC foods in one easy stop. SNAP also accepted. Find a store near you online.

WIC Inspired Recipes – Chilaquiles & Salsa

2023-02-10T11:15:02+00:00February 10th, 2023|Categories: Meal Planning, Recipes, WIC Food, WIC Grocery Shopping|Tags: , , , , , , , , , , , , |

CHILAQUILES & SALSA 

Makes 2 servings.

SALSA

1 large onion

4 – 5 large tomatoes

1 jalapeno

(remove seeds from jalapeno, or replace with ½ bell pepper if you don’t want it spicy)

Juice of ½ lime or lemon

1 cup cilantro

Salt and/or sugar to taste

For extra flavor, add a whole bulb of garlic to the veggies!

Cook vegetables in the oven at 425 degrees for 30 minutes, turning the veggies over halfway through. Allow to cool for about 15 minutes, then add veggies into a blender along with cilantro and lime or lemon juice. Blend until there’s no chunks, then it’s ready to serve!

CHILAQUILES

2 tbsp Vegetable oil

6 Corn tortillas, each cut into 6 wedges

2 Eggs

1 cup of Salsa 

(To save time, you can use WIC approved Always Save Mild Salsa from Grocery Services North instead of making your own)

Pepper

Additional Optional Toppings – Sliced avocado, shredded cheese, onion, cilantro, or even more salsa!

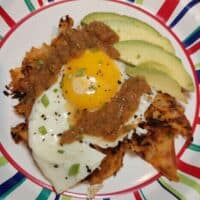
In a large non-stick pan, coat generously with about 2 tbsp vegetable oil and heat on stove top to medium high heat. Once the oil is hot, add the tortillas and fry until golden brown. Remove from heat and move tortillas to a paper towel lined plate to soak up any excess oil. Remove any remaining brown tortilla pieces in the pan. Add 1 tablespoon of oil to the pan, add the salsa and let cook for a few minutes while stirring occasionally. Add the fried tortilla wedges to the pan and gently turn over until tortillas are coated with salsa. Let cook for a few more minutes until tortillas are thoroughly soaked in salsa, yet still slightly crispy. Remove from heat and move tortillas to the plates. Return the pan to the stove top and fry the eggs. On each plate, top the tortillas with the fried eggs. Top with your choice of favorite toppings like shredded cheese and/or avocado for some extra flavor!

Enjoy!

Toddler Snack Boxes

2023-02-09T18:32:30+00:00February 8th, 2023|Categories: Child Health, Meal Planning, Recipes, WIC Food, WIC Nutrition|Tags: , , , , , , , , |

WIC Food Tip Perfect For Busy Moms

Toddlers love snacks! Moms of little ones may find themselves running around trying to find snacks on demand. Here is a great tip to use your WIC foods to make a perfect snack box for your little one.

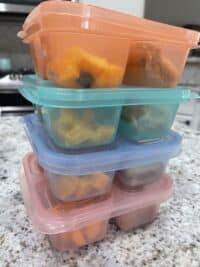
One stress-free way to help busy moms looking to save some time, are pre-made snack boxes. Dig around in your cupboard for some plastic containers with lids. It doesn’t have to be fancy. One with compartments is perfect, but a food storage container without dividers also works. (TIP: You can use cupcake liners to make your own compartments) 

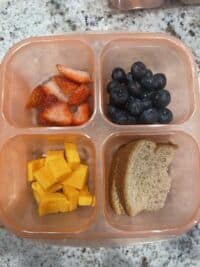
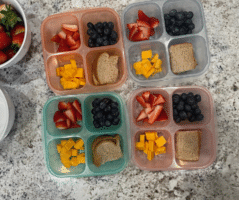
Grab a few of your toddler’s favorite WIC foods. Create a fun assortment of 3 to 4 single serving snacks in each container to make a perfect toddler-size snack pack to store in the fridge. Some ideas for your containers include:  cheese cubes, sliced strawberries, orange slices, blueberries, avocados, healthy WIC cereal (without the milk),  yogurt, peanut butter and whole wheat bread.  Make a whole peanut butter sandwich and cut into 1/4ths. Put one fourth in a container. 

Store the snack packs in the fridge until needed.  Making 2 or 4 containers at a time is perfect to have on hand when your little one wants something quick to eat.

This is a great way to help make sure your little one is eating healthy WIC foods. You can also get your kids involved in making their “snack packs” so they are excited to eat healthy foods. 

HAVE TODDLERS ON WIC? SHARE YOUR MOM HACKS

Do you have a great mom hack? Leave it in the comments below. We would love to hear some of your favorite tips/tricks that save you time. 

The ultimate mom hack is getting all your WIC foods in one easy stop at Grocery Services North stores. Visit a location today to see how easy it can be.

Looking for more helpful ideas?  Check out our post about WIC Snacks.

January 2023

Mom Hacks Using WIC Foods

2023-01-11T16:06:33+00:00January 5th, 2023|Categories: Baby Food, Child Health, Grocery Services North, Meal Planning, Mom Health, Pregnancy, Recipes, WIC Food, WIC Grocery Shopping, WIC Nutrition|Tags: , , , , , , , |

Moms and moms-to-be all need savvy, time-saving hacks to save time, be healthy and to maintain sanity.

Infant and toddler moms don’t usually have a lot of spare time. Moms often feel a lot of stress to take care of tiny humans. That’s why we have come up with some great mom hacks to help save time while offering a little piece-of-mind.

Stress for expecting mothers can also be high. What can you eat? What should you not eat? It can be overwhelming. Not to mention, you are creating a human in your belly. That is very tiring.

PREGNANCY HACKS

Now is the perfect time to practice carrying a prepared bag (think diaper bag for moms). Except this bag will be filled with healthy snacks/water for mom. Here are a few ideas for your mom bag: water bottle, dry WIC-approved cereal – which is packed with iron and fiber. Other ideas for your “snack” bag: fresh fruit like bananas or peanut butter on whole wheat bread. Get more information about WIC foods and pregnancy here.

TIME SAVING COOKING HACKS FOR MOMS

Every mom loves a good kitchen shortcut. Here are a few ideas you can use in the kitchen to help you save time and maintain your sanity.

  1. First up: homemade teething rings. When toddlers start to teeth, it can be painful for your baby and hard on mom. No parent likes a little one to cry in pain. Make homemade teething ring popsicles. The cold pop is perfect for sore gums. Plus, because you can make several at a time and freeze you will have treats for weeks to come. Here is a recipe you can use:

BERRY YOGURT POPSICLES

1 ½ bananas (mom can eat the other half)

16 ounces of yogurt (any flavor)

4 ounces of blueberries

Blend all ingredients in a blender until it is very smooth. Place yogurt mixture into popsicle molds. Freeze for at least 6 hours. Keep in the freezer for the next time your child needs a treat.

2. Here is another time-saving hack: make pre-made snacks for hungry toddlers. Moms know that one of your main roles as a parent is to give your child healthy foods. It can often feel like a full-time job. You can save time by making several pre-made snacks to keep on hand. Pre-cook boiled eggs to have on head in the fridge. These are great for children starting to eat real foods and older kids looking for a snack. For kiddos starting to eat table food, make sure you have easy foods you can grab when your baby is hungry. A few great examples are avocados and bananas that can be smashed for smaller children. Here are a few more ideas for snacks using WIC foods.

CRAFTY PROJECTS

Having a little fun can also be a great way to take a break and cut the stress. We have gathered a few hacks using containers from WIC foods. Use empty and cleaned milk and egg cartons for fun crafty projects. So are baby food jars. Here are a few ideas:

  1. Turn your egg carton into a fun container for kid paint. Each egg holder can be for a different color. Your egg container could also be used to create a homemade sensory tray. Fill the egg carton with items with different textures that you can find around the house: a small ball of yarn, a block, a small piece of fabric. Just make sure the items are age-appropriate and are not a choking hazard for your little one.
  2. For older kids, use the lids from your milk jugs to make checkers pieces. Just color the lid black or red. Save enough to make your own checkers pieces. Make a checkerboard out of cardboard or a piece of paper you have around the house.

Of course your imagination is the limit for using containers to help entertain your kids. Sometimes kids enjoy making toys out of the simplest items around your house.

The best mom hack of all is to get all your WIC foods in one easy stop at any Grocery Services North location. Since you won’t have to go searching down long aisles to get all your WIC foods, you will save time and your sanity. Find a location near you.

Do you have mom hacks you would like to share? Drop them in the comments below. Use hashtag #GSNmomhacks

Looking for more blog articles about these topics? Check these out:

Join WIC During Pregnancy

3 Reasons To Join WIC

December 2022

WIC Inspired Recipes – Corn Chowder

2022-12-06T14:07:18+00:00December 6th, 2022|Categories: Meal Planning, Recipes, WIC Food, WIC Grocery Shopping|Tags: , , , , , , , , , |

Everyone seems to be talking about corn these days. With the viral song about corn, it seems most of us can appreciate the vegetable for it’s sweetness and versatility. Corn just seems to go with everything! This hearty corn chowder recipe is sure to keep your family warm this fall and winter. It’s so tasty and comforting, you may find yourselves going back for a second serving!

CORN CHOWDER

2 tablespoons butter

4 slices of bacon (optional)

1 onion 

2 celery stalks 

1 bell pepper

1 jalapeno 

1 large carrot 

3 medium potatoes 

6 ears of corn

5 cups milk

1 bay leaf

Salt & Pepper

Smoked Paprika

Green onion

Peel potatoes and dice along with onion, celery, carrot, bell pepper, and jalapeno.  Shuck the husks off the corn and slice corn kernels off of the cobs, then save the cobs for later. (You can also use canned or frozen corn to skip this step! But you’ll want to add the corn in with the rest of the veggies to get more corn flavor) Slice some green onion & shred some cheese to top off each bowl of corn chowder if you like!

Place butter and bacon into a large, heavy-bottomed soup pot. Heat on medium high heat until the bacon renders its fat, about 5 minutes.

Cook the vegetables (except the corn and potatoes):

Add the chopped onions, celery, bell pepper, jalapeno, and carrot, and lower the heat to medium and cook until vegetables are well softened, about 10 minutes.

Break the corn cobs in half (after you’ve stripped off the corn) and add the cobs to the pot. Add the milk and the bay leaf. Bring to a boil and reduce heat to medium. Cover the pot and cook for 20 minutes, stirring occasionally.

After 20 minutes, discard the cobs and the bay leaf. Add the potatoes, corn, salt, pepper, and paprika to the pot. Increase the heat to return the soup to a simmer, then lower the heat to maintain the simmer and cook for another 20 minutes until the potatoes are tender. Stir often to prevent milk from curdling. Add more salt, pepper, and paprika to taste, and add a little shredded cheese and sliced green onion on top of each bowl when serving. Enjoy!